Tuesday, October 8, 2013

Tips on Tuesday: Lotion up with Curél Intensive Healing

Hiya! I do this fancy pantsy thing called BzzAgent. Sometimes, when the stars align (aka my profile is up-to-date and I fit the criteria and completed all my surveys) they send me free stuff to try out and give them feedback!
You can sign up here.

photo credit to the Google image monster

Just recently I opted into the Curél Intensive Healing hand cream campaign. Not only do I always need a good hand cream, but I am sure you, as my readers, are always on the look out for one too!
At the end of the post I have a before and after look at my nails/hands and fun Halloween nail art using a new polish from Carpe Noctem's Samhain/Halloween line!


I like a good cream because my skin dries out so quickly and I tend to get eczema on my elbows, on occasion, so the Intensive Healing part of this campaign really intrigued me!
I also have a cat who sleeps in my bed, so I need a cream that isn't greasy, otherwise I'll be eating cat hairs and getting them stuck in my eyeballs or mouth on accident all night.
Keep reading to find out if Curél is a lint trap or not!


I was sent a 1 oz pot of lotion to test out with some extra pots that I sent off to some other bloggers!
So why exactly is this lotion unique?
It helps stimulate the production of ceramides, which are the protective barrier that helps "glue" the surface skin cells together. When this protective barrier is compromised, your skin is more susceptible to dryness!


Curél Intensive Healing is fragrance free and hypo-allergenic. I like it when hand creams are unscented, as I put my hands near my face and mouth a lot too much and sometimes the scent starts to bother me. This cream looks like a whipped body butter in the canister, but is actually nice and thick!


It does go on seemingly sticky and greasy, however it is REALLY FAST absorbing! 
No kitty hair for dinner tonight!
For just a few minutes it feels like there is gak on your hands, but after it transforms your skin into a silky powdery feel. The only thing I didn't really care for about this cream, is that is comes in a canister. I prefer a squeeze tube, because the lotion won't get stuck under my nails that way. It is also on a expensive side. A 16oz canister will run you about $10-$12, even when purchased at Walmart.
Although, for those of you who suffer from eczema know that some creams do and don't work, and finding one, even if it is expensive, is a lifesaver!!

Since this is a nail blog I obviously had to squeeze in some nail art! I have a before and after comparison of my hands and cuticles after using Curél hand cream!


Before. 
You can see that my fingers are especially dry, showing a lot of my skin cracks and my cuticles are looking a little flaky around the edges.


After.
My fingers definitely look improved from the before photo and look a lot smoother. My skin also doesn't appear shiny and tight looking, like the before photo.
I have also been using this cream on my elbows to ward away any unwanted eczema! It took a few days, but my elbows are feeling a lot smoother than they were!

Overall, I enjoy this hand cream but I do wish it was in a squeeze or pump container and that the price point was a little lower. Unfortunately, when I am in the market for another hand cream, I might opt for a more budget friendly and more favorable container option over this one.

You can find Curél on:

I also have several $2 off Curel Intensive Healing coupons up for grabs! 
Message me on Facebook if you want one!

Polishes used in this post:
Carpe Noctem Cosmetics Fright Night 
Art Club Stripers in black and white.
Sephora Matte topcoat
Wet n Wild Glow in the Dark top coat

**Disclosure: The product(s) in this post were provided to me by their manufacturer or Bzzagent for my unbiased review. Please see my Disclaimer page for more info**


Monday, October 7, 2013

Indie Review: Noodles Nail Polish

*Purchased by Me
*3 Free & Cruelty Free
*Noodles Nail Polish

Sometimes I go on Etsy and just search for Holiday Nail Polish. Or Halloween nail polish, recently. Othertimes, I might just type in green glitter nail polish and see what pretties appear before my eyeballs. This was one of those aforementioned scenarios when I stumbled on Noodles Nail Polish.
The photos of Sleepy Hollow were stunning and I wanted it.

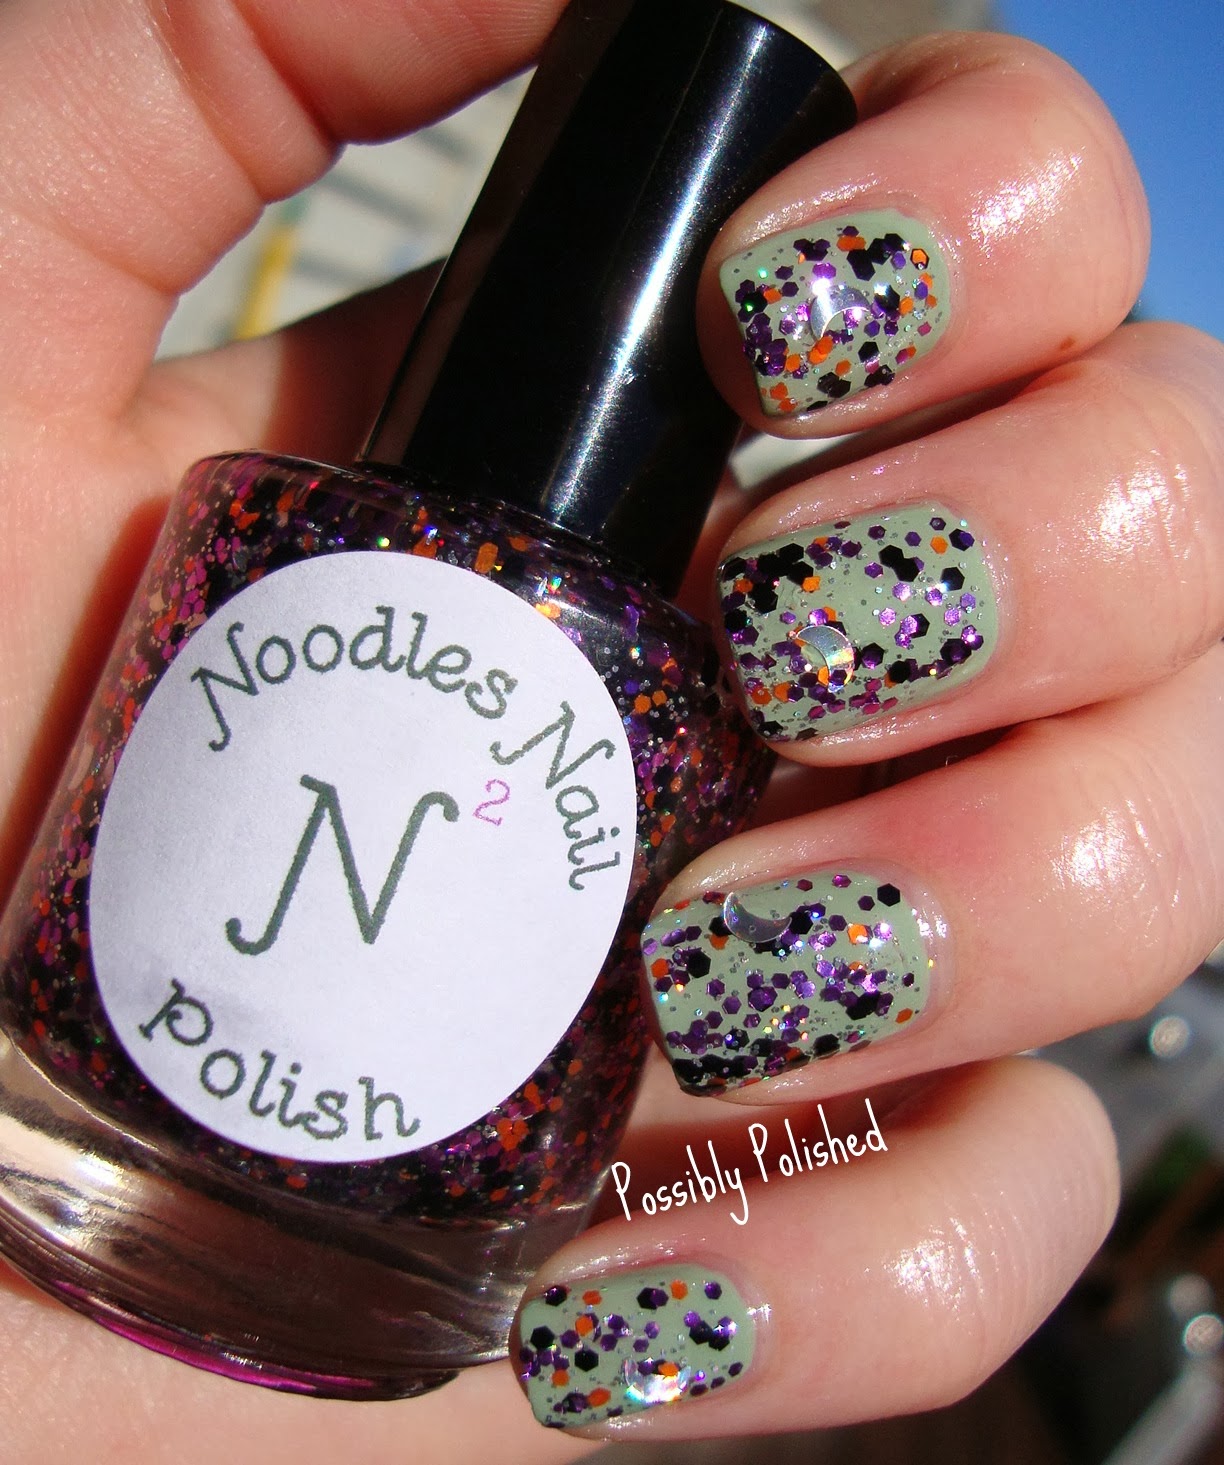
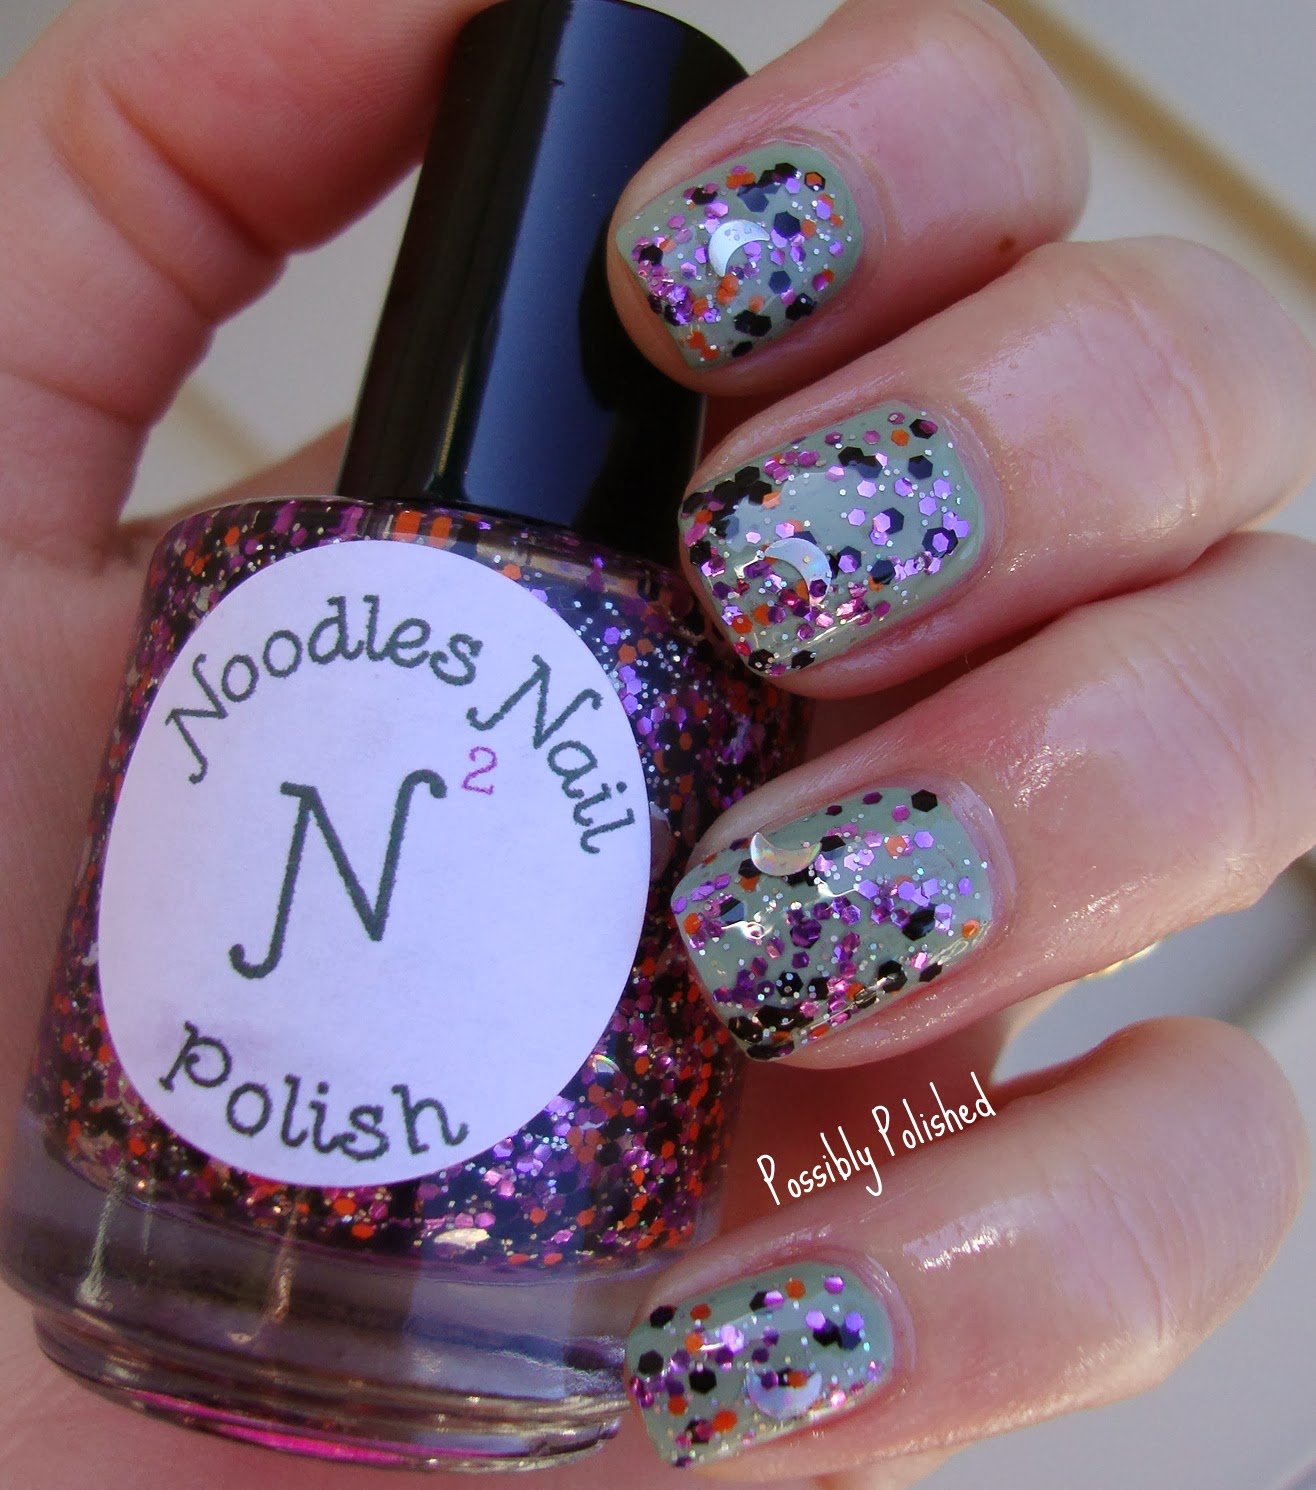
You can see in her shop photos of Sleepy Hollow over a dark purple base. I have it here over a light green and a dusty purple brown. You decide which your favorite view of it is!


Lovely Macro shot of Sleepy Hollow! Sleepy Hollow is a glitter topper made up of purple, black and orange hexes, sprinkled with small holographic glitter and even silver moons!


I paired this over 2 coats of OPI Stranger Tides. 


I got a fair amount of glitter in just one coat. The brushes on Natalie's polishes are the nice thin kind. I tend to like these types of brushes because I have small nails and a small brush is easier to create clean lines. I used the blob and spread method here, which worked the best having a smaller brush! 2 thin coats would also do the trick.


The silver moons were a little tougher to get out of the bottle, but not impossible. I store my indies upside down and I recommend letting this one hang out that way for a couple minutes.
I think the green really brought out the purple and orange glitter. I just love purple and green together though!

Next up I paired 1 coat of Sleepy Hollow over 2 coats Revlon Stormy Night. Which if you don't already own, is one of my most favorite shades ever and is my go-to for Fall and winter.


This looks so great over a darker base color.


Overall, I really loved this topper and it is so perfect for Halloween. It captures the Halloween spirit perfectly, without being too dark or daring for those of you who steer clear of bold and loud polish.

You can check out more of Noodles Nail Polish on

Head over and like Natalie on facebook for an exclusive discount code!

Do you purchase Halloween themed polishes or will you be working with what you have?


Sunday, October 6, 2013

Indie Review: Spellbound Nails does Halloween

*Purchased by me (blogger discount)
*3 Free & Cruelty Free

I love Halloween. It is one of my favorite holidays. Maybe it's the candy or the costumes or the parties...Probably the candy, but I just love it! Since I have discovered the Indie Nail community, I find the indie polish makers create polishes for these niche holidays best.

I have 3 of Spellbound Nails Halloween collection for you today.

I normally don't like blacks, but the bottle shots Ashley showed of You're a Virgin? really sparked my interest. Plus, I wanted to matte it.


You're a Virgin? is inspired by who lit the black flame candle in Hocus Pocus. As a black jelly with red glitters suspended throughout, it really captures the essence of the black flame candle.


I layered 1 thick coat of You're a Virgin? over 2 coats of Zoya Raven. I went with the glossy look first using a coat of NYC top coat. Then...I matte-fied it and added a Halloween water marble accent nail!


I absolutely love it matted. This went on so smooth and looked so awesome both ways that I can't imagine not having this polish for Halloween! I finally settled on being a witch for Halloween and I have an inkling that this polish will go perfect!
I used Zoya Raven and Zoya Thandie for the accent nail.

Next up is Pumpkin Crusher, an orange to green thermal! Ashley also has this thermal available as a holo.


Pumpkin Crusher is another jelly polish with orange and green glitter suspended throughout. It changes from a bright orange (color when cold) to a bright green (color when warm). You can see it shifting from orange at the tips to green at the base of my nails here!


Shown here is 3 coats with 1 coat of NYC top coat. Application was smooth and it built up nicely in 3 coats. There is little to no visible nail line, which is what I always hope for with jellies!


My hands were warm so my nails kept wanting to change to the green but you can see my pointer and ring finger are almost totally orange.

This is my first thermal polish and I definitely thought it was cool, although I do wish I picked the holo thermal!

Next up I chose Firefly from Hell, a glow in the dark polish!


I layered 2 coats of Firefly over 2 coats of Julep Nan.


I love that Ashley added glitter to this! It really makes it such a pretty top coat! It dries matte and is very lightly textured, but a top coat would smooth it out perfectly.


For the next 2 pictures, I charge it for a couple minutes under a black light and took the photo in complete darkness. I was impressed with the initial glow factor, but I did find that the glow dulled over the next couple of minutes. It did still continue to faintly glow however and never lost its glow completely.


Overall, I love love You're a Virgin? and will definitely be using it again! You can check out the rest of Spellbound Nails Halloween collection on:


**Disclosure: The product(s) in this post were provided to me by their manufacturer at a discount for my unbiased review. Please see my Disclaimer page for more info**

Thursday, October 3, 2013

Disney Vacation

Hello! Before my recent Disney World vacation to Florida becomes a distant memory, I wanted to post the nails I wore as well as some photos and fun stories from my trip!
I haven't been back to Disney since I was very little. I didn't remember anything about it really and I was so pumped to be going back!
Here is a throw back Thursday photo of the first time I went to Disney and one of this past time!


It was so fun! My cousin and I spent the first night at Micky's Not So Scary Halloween Party in Magic Kingdom. They had the Hallowishes light show and some awesome fireworks! We even saw a lot of the Disney Villians.


It was awesome!

On my nails I wore OPI A Definite Moust have from the Minnie Mouse Collection!


I used an Art Club white striper and a dotting tool for the dots and an Art Club black striper for the black Micky Mouse ears on my accent nail and on all my other nails.


My accent nail was 2 coats of Layla Soft Touch 01 and Spellbound Nails Fall in Love from her Fall 2013 collection was the perfect glitter! You can see more swatches of Fall in Love here! The black and red and holo glitters went so perfectly!
I got the inspiration for this mani on Pinterest HERE.

A funny thing that happened to me was on the first leg of my trip. Upon my arrival at the hotel there was a cute little squirrel sitting on my balcony! He ate treats right out of my hand! In hindsight...I shouldn't have done this...


But he was SOOO cute! When I was packing up the last night in that hotel, I opened my slider door to get some of the warm air inside. I looked up 30 seconds later to 2 squirrels INSIDE MY HOTEL ROOM sitting on my lounge chair next to the open door!
o.O
I shooed them out with a T-shirt but jeez louise! He sat outside my balcony looking in for quite some time. Poor little fella.


I was hoping to meet Cinderella while in Disney, but I never got a chance! I did meet a few of the other Princesses though!
It was a fun trip.

Did you take any fun vacations this summer?

*Some of the polishes used in this post were provided for my honest review. See my disclosure page for more info.

Tuesday, October 1, 2013

Tips On Tuesday: Fall Nail Art Tutorial

I have been trying to wish back summer, but October is upon us, so I better start facing the facts! A lot of you enjoyed my 4th of July nail art tutorial so I figured I would do an easy nail art tutorial for all different seasons and holidays. What do you think?! 


Tonight I will have an easy-peasy Fall nail art tutorial for you using the Saran Wrap Method. I promise it is really easy and anyone can do this!

Things you need:
1. A solid base color. I chose Julep Sylvia but any dark polish will work! Think navy blue or deep magenta or vampy purple!
2. A gold metallic polish for dabbing. I used Color Show Bold Gold. Gold screams Fall to me!
3. Saran Wrap
4. A Paper plate
5. A base (optional) and top coat. I use a SH Base coat and NYC In a NY Minute for a top coat. You can skip the base coat, but the top coat really smooths things out, so I recommend using one.

There are 2 ways to doing the saran wrap method. I like this way the best because it allows for more control over the polish that is dabbed on. 

First, prep your saran wrap! I like to pull out a piece the size of a sheet of paper and then I cut it into smaller pieces. You will need at least 2-4 pieces, about the size of your hand or palm.


Put the pieces of saran wrap aside and paint your nails with a solid base color.
I used a dark purple.


Now...the hardest part to this entire tutorial comes right after this part...
WAIT FOR IT TO DRY. 
I'm serious. 
Wait.
Patience, young grasshopper, patience.

Once your nails are dry you can get to the good part! Set up the rest of your materials! This is the part when you will need your paper plate, gold polish and saran wrap.
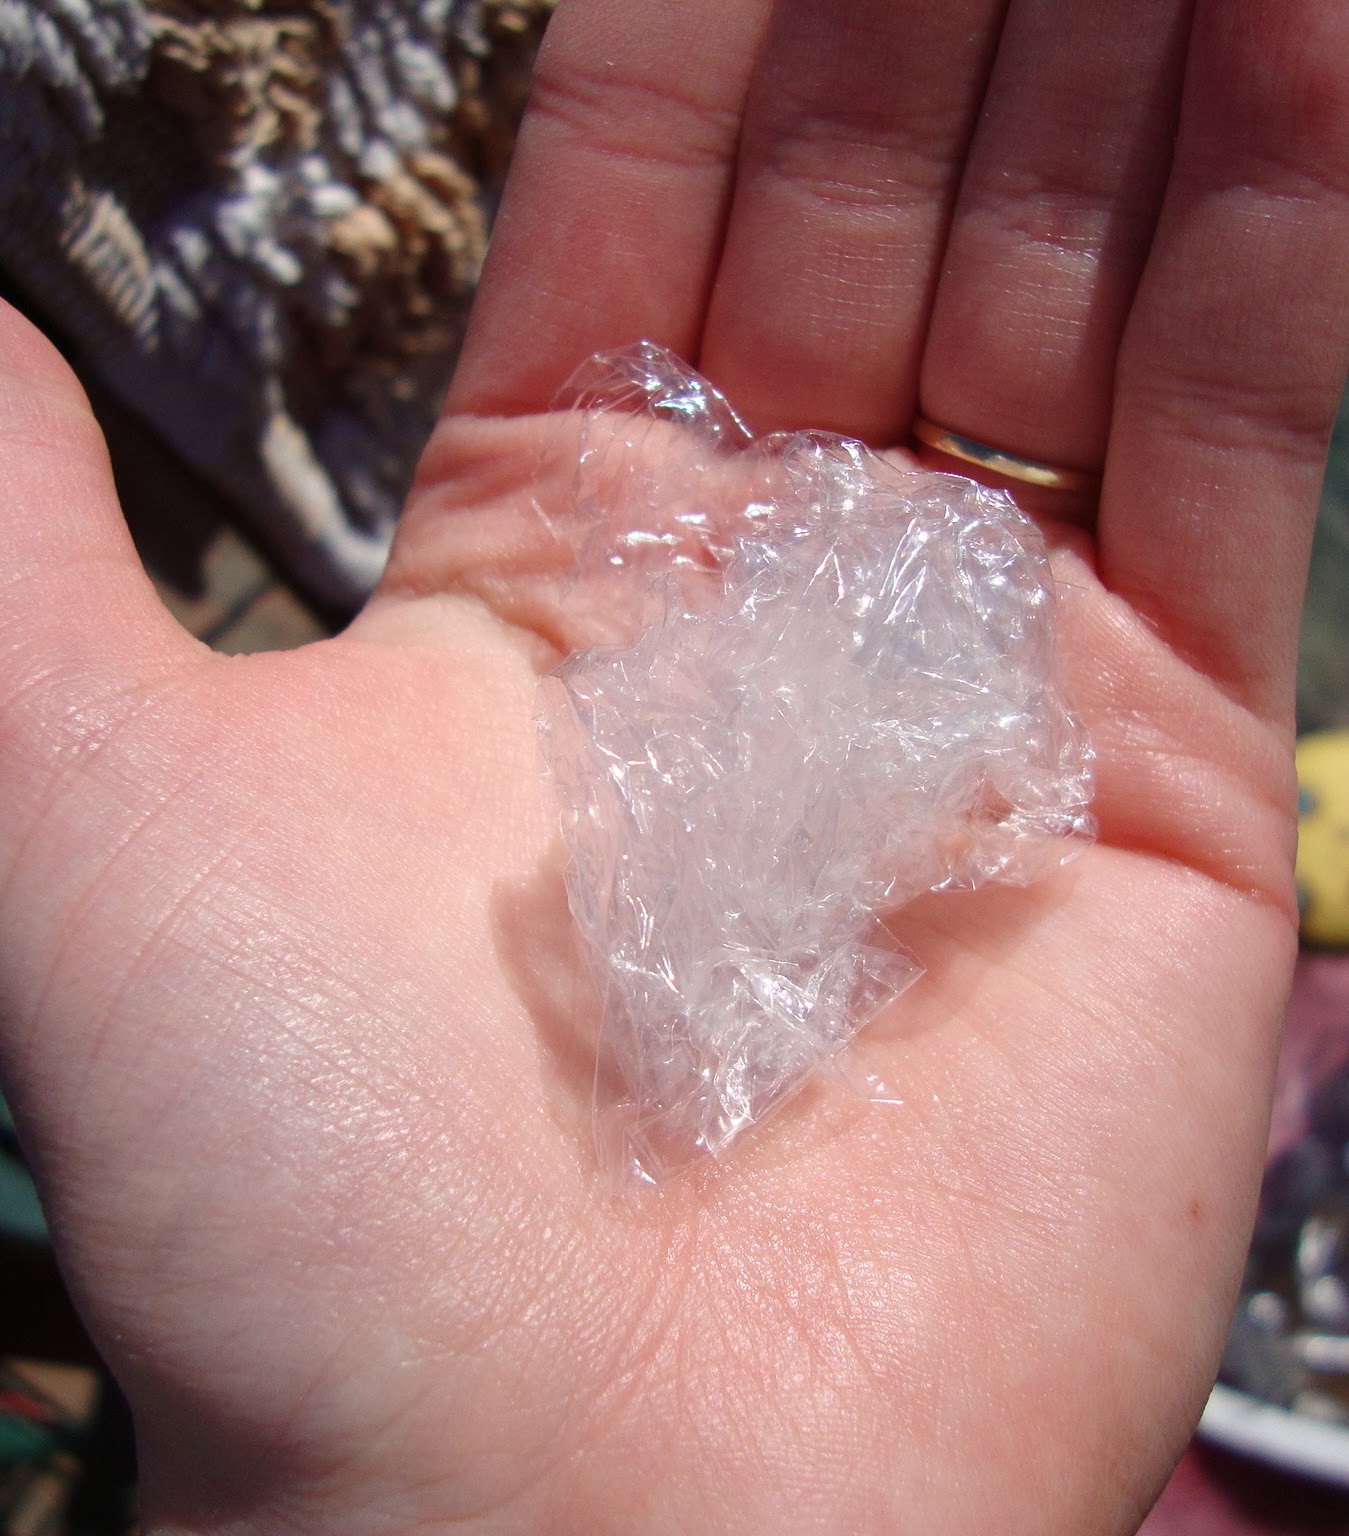
Start by crinkling your saran wrap up into a ball.


Roll it up into a nice little ball, and then drip some gold polish onto your paper plate.


Once you drip the polish onto the paper plate, make sure to hold your saran wrap ball tightly between 2 fingers.


Depending on how tightly you wrapped the ball, will depend on how big the splotches are on your nails. I like to wrap mine up a little bit tighter to get more precise splotches.


Once you have decided on how you want to hold your saran wrap ball, dip it into the polish on the paper plate.


I like to stamp my saran wrap ball around the plate a little bit because I don't want a huge glob on polish on my nail. I want to make it look more delicate-like. I drew an arrow to one of my ideal splotches. Once I see this, I dab onto my nail.
Once you stamped your saran wrap around a bit, dab it directly onto your nail.


Dab onto each nail a couple of times until you are satisfied with the look! Sometimes you can get a couple of dabs before you have to dip the ball into the polish again. And if you end out not liking the splotch, don't be afraid to shift the saran wrap around and try another side of the ball. When the saran wrap gets too covered in polish, crinkle up another one of your pieces and start a new ball!


Seal the design in with a top coat and you have a perfect Fall manicure with a cool technique! I love using this technique and have used it over and over with a variety of different shades. Don't be afraid to experiment!

Will you try this? Have you ever used items commonly found around the house for nail art? Tell me in the comments -- I will definitely be trying out your tips & tricks!


Monday, September 30, 2013

Indie Review: Paint Shop Polish

*Press Sample
*3 Free - Cruelty Free

A couple of weeks ago Candi from Paint Shop Polish reached out to me and asked me to review 2 polishes from her Fall line and 2 from her Halloween line. Now I was so excited about this, because it was the first time an indie maker has reached out to me before I initiated contact! 
It gave me warm and fuzzies :)

On to the polish! I will show you the 2 polishes from the Fall line I received first. 
Apple Pickin' is up first!


Apple Pickin' is what I did this past weekend! I love heading to the orchard, sitting outside and eating a candy apple that I mostly smear all over my face and get stuck in my hair. 
Apple Pickin' is shown here as 2 coats with 1 NYC top coat.


This shade reminds me of a candy apple. It is the perfect soft red that just is so pretty for Fall without being too red-in-your-face. Application was very smooth and even. This built nicely to opacity and despite the shimmer qualities, there were no brush strokes. I ended out keeping this one on for a couple days and got pretty good wear too! 3 days before I took it off!


I really love this shade of red! Dry time was average and removal was easy!

Up next we have Spiced Cider. Another one of my Fall favorite treats.


Spiced Cider is a light champagne colored gold. It took three coats to reach opacity because of the lovely fine glitters in it! I bet this would also make a nice glitter top coat over a dark polish!


The formula was smooth and even. I loved the shimmer in this one! 


I think this will make such a nice holiday polish too. I can totally see wearing this for Christmas or Thanksgiving or using it as an accent nail to dress up another manicure!

Next I have 2 polishes from Candi's Halloween line.


This gorgeous violet purple jelly is Hocus Pocus. I think Hocus Pocus is one of everyone's favorite and most well known Halloween movies!


Hocus Pocus is shown here as 3 coats and 1 coat of NYC top coat. It built up nicely, but as you can see there is some visible nail line still peeking through. This is typical of Jelly type polishes though!


Application was smooth but the first coat did go on a little patchy. However, the second and third coats evened it out completely.

Last but not least, is Monster Mash!


Monster Mash is a mash up of glitters! There are black shards, orange and neon green hexes and purple squares.


Those neon green glitters glow in a blacklight too! Sweet! I swatched Monster Mash over 2 coats of OPI My Vampire is Buff. This glitter was a little thick and unfortunately, my usual glob and spread method didn't really work. Because of all the different shapes, the glitters kept wanting to stick together! I ended out spreading one coat on my nail and then using the dabbing method, I filled in any holes.


I don't really mind putting in extra effort for a glitter. I feel like I would rather have the glitter how I want it on my nails anyway! This glitter really screamed Halloween to me. I liked that it still gave a real Halloween-y feel, even over lighter colors, because I totally feel those of you who don't like to wear dark polish!


I also swatched this over Essie The More the Merrier and SH Xtreme Wear Lacey Lilac. This glitter definitely looks good over a variety of different shades of polish! 

Overall, I enjoyed all of these polishes! My top picks are definitely the Fall Collection though! I am really loving the red and golds this season!

You can find Paint Shop Polish on

Candi has some lovely solids and glitters in her shop AND guess what? If you use code POSSIBLYPOLISHED you can get 15% off of your order!

**Disclosure: The product(s) in this post were provided to me by their manufacturer for my unbiased review. Please see my Disclaimer page for more info**