Sunday, September 29, 2013

Falling for Fall with Color Show

I have been totally slacking on posts since I came back from vacation so I am trying to catch up! I also had a cold. I am a super big baby and feel like the world is ending when I have a cold, which explains why I fell off the face of the earth this past week. 
Tonight I have the first Fall polishes I picked up this season to show you! I picked up 3 of the 10 Color Show Vintage Leather shades that really stood out to me a couple of weeks ago. 

First up is Classic Camel.


I will describe the formula to you at the very end of the post, since these were all very similar. The first 2 photos are matte, and the next 2 photos are with NYC top coat. All swatches show 2 coats.


Classic Camel is a lovely fiery orange. It has little silver flakies in it and dries matte. It actually dried very quickly and began to matte almost as soon as I had finished with my brush strokes.


This really glows with a top coat!


I really liked this both matte and glossy, I can't decide which I liked better!


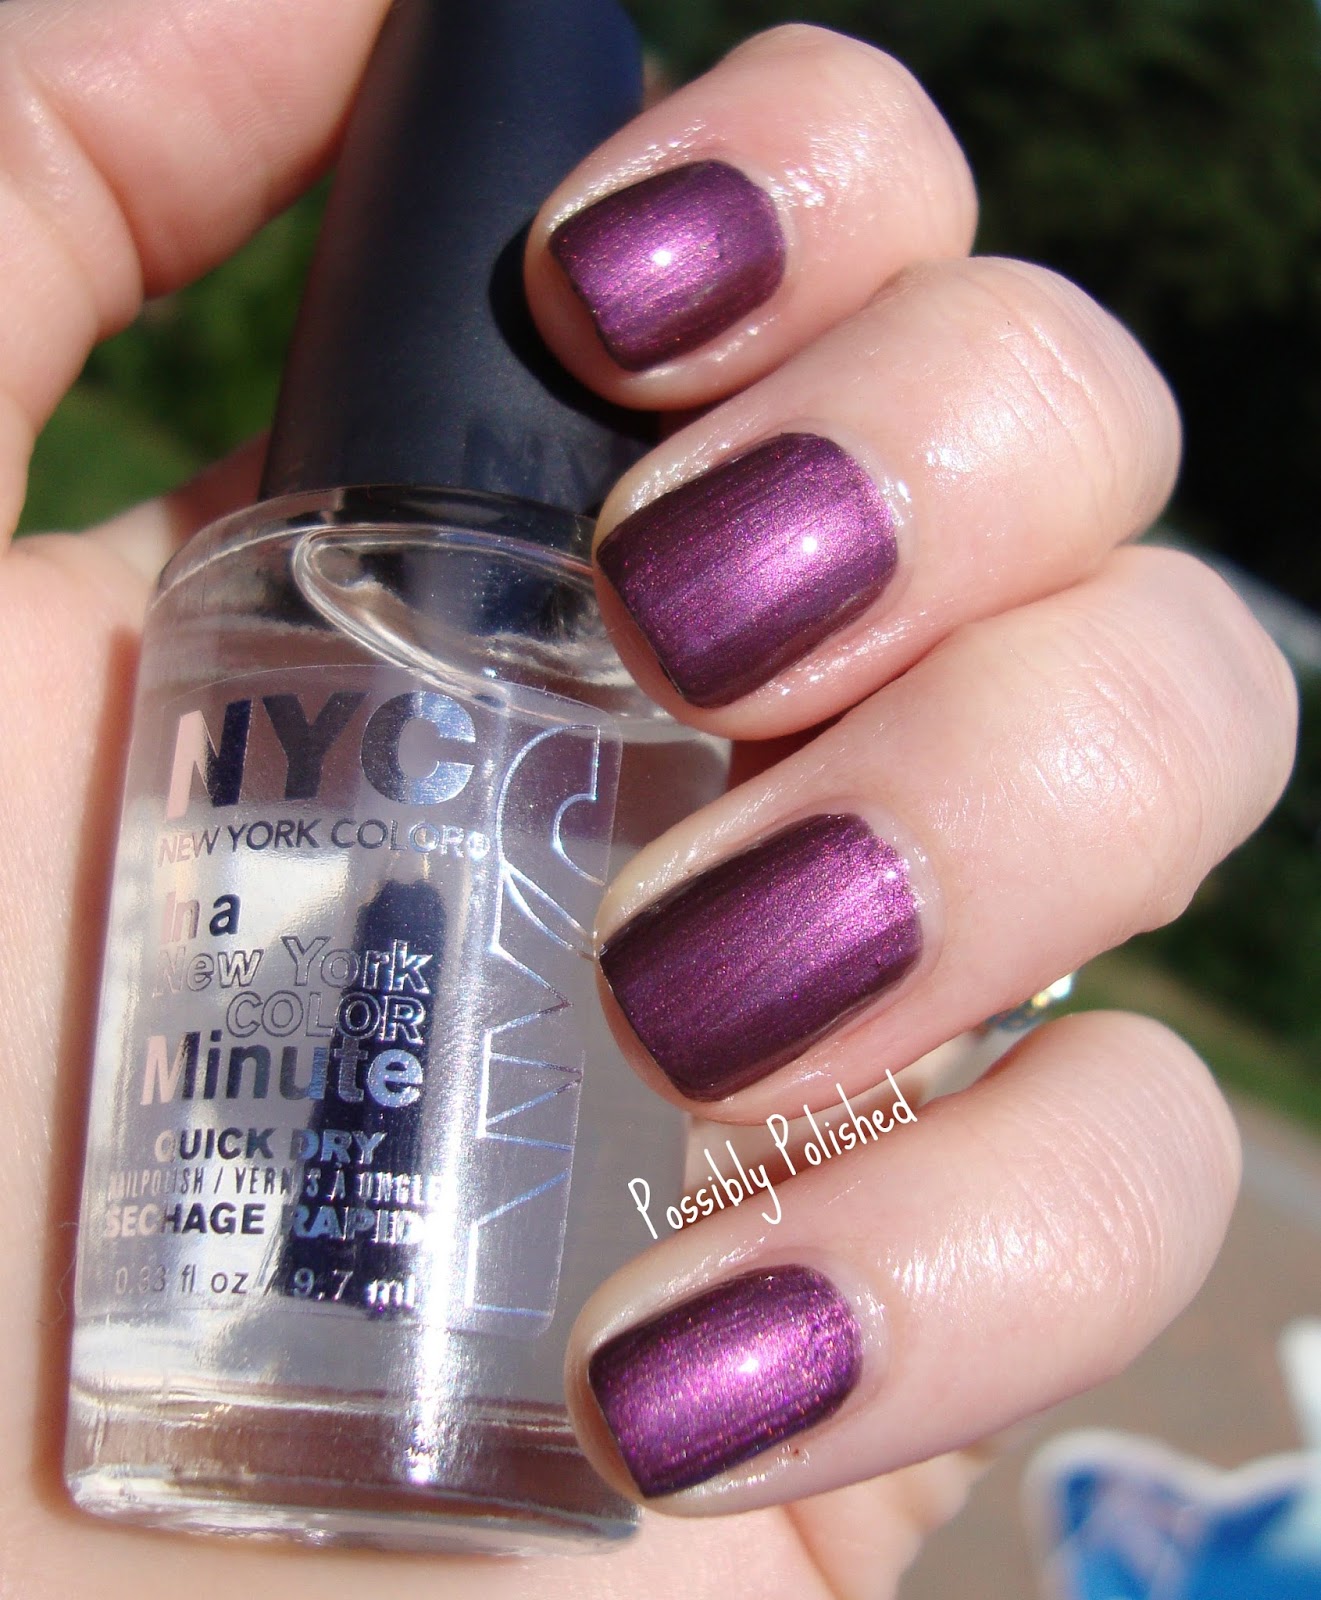
Next up is Plush Plum. The first 2 photos are 2 coats of polish, and then next 2 photos are with 1 coat of NYC top coat.


This one was a dark magenta. I ended out liking this one the least. Despite it being a typical Fall Shade, I don't think it was very unique.


There were also small flakies mixed in with this shade. I think the flakies sort of created a nice depth to this shade.


Next up is Mod Moss, which ended out being my very favorite. 


Mod Moss is the most lovely shade of army green. I love green polish in every delicious hue. but darks compliment my skin tone nicely and I just love them!


The first 2 photos are 2 coats of polish, and the next 2 have 1 coat of NYC top coat.


I love how pretty this shade was with top coat. You can see the flakies in the bottle in this shot pretty well.


Let me talk a little about the formula on these. The formula was a little hard to work with. Each of these dried so quickly, that it made it hard to paint each nail evenly. They started to matte-fie almost immediately! However, I think putting the top coat on afterwards smoothed it right out. Each of these also contained small flakies, which to me, didn't really translate to the nail very much. You can see above that they are not very noticeable.

Overall, I love Mod Moss and Classic Camel but could have passed on Plush Plum. What do you think? Is matte polish still in?


Tuesday, September 24, 2013

Indie Review: Glitterfied Nails Diamond Ring

*Press Release
*3 Free & Cruelty Free


I have been totally out of commission since coming back from my vacation! I had a ton of fun in DisneyWorld, but apparently, I brought some germs home with me and now have a lovely sinus infection. Pretty much all I want to do is close my eyeballs so my head doesn't explode. 
BUT I can't wait to show you this amazing glitter from Andrea at Glitterfied Nails called Diamond Ring. It is so amazing!!

So amazing that I swatched it over 3 different colors and I wore it around town in a Galaxy mani. 


Diamond Ring is described as an iridescent opal glitter. It contains several different sized and shaped glitter in a clear base. The glitter shifts to many different pastel shades when over different colors and in different lights.


Here I layered Diamond Ring over 2 coats of Revlon Sugar Plum


Diamond Ring showed a lot of blue here over Sugar Plum. I am falling in love with this glitter all over again! Shown here with 1 coat of NYC Top coat.


Another shot of Diamond Ring in the sun.


Next I paired Diamond Ring over 2 coats of Revlon Chroma Chameleon Cobalt.


I love how evenly this glitter topper spread out and what great coverage I got in just one coat. You can see how many more colors can out over this blue. I see yellow, orange, blue, green and red!


I swatched it one final time over 2 coats of OPI Manicurist Of Seville.


Manicurist of Seville is a deep maroon shade and the iridescent glitters show up great over this one too. This glitter topper is awesome! It went on so smooth and you can see I got great coverage in one coat. Dry time was average and all glitters dried flat to the nail.

I decided to use this as a topper over a Galaxy mani. If you follow me on IG @PossiblyChrista, then you already saw a sneak peek of this mani! 
I am over the moon in love with this! This is my favorite galaxy mani to date!


Diamond Ring added just the right amount of galactic glitter to this mani.

What do you think? Do you think this glitter is as beautiful as I do?!

You can find Glitterfied Nails on

Andrea specializes in her Team Spirit lines and has so many awesome glitter combinations that are perfect to rock your favorite sport or school colors! Go show her some love!

**Disclosure: The product(s) in this post were provided to me by their manufacturer for my unbiased review. Please see my Disclaimer page for more info**

Tuesday, September 17, 2013

Guest Post: Tips on Tuesday with The Classy Anarchist


Hello hello! I got home from my trip late last night and I can't wait to share some photos from my trip! 
For the last Guest Post, I invited Aly from The Classy Anarchist to do a Tips on Tuesday post for you! She chose to give you some tips on achieving the perfect Gradient Nails! I am so pumped to share these tips with you guys because I will definitely be using them! She did an awesome job!
Thanks Aly!
******

Perfect Gradient Nails

First of all, I'd like to thank Christa, the wonderful blogger behind Possibly Polished, for giving me the opportunity to guest blog for her! The topic I am covering is gradient nails (a favourite of mine)! Gradient nails are an easy and fun nail art technique to learn. They add pizzazz and dimension to any nail art design, and I'd like to share with you some nail gradient basics, plus my top five tips when doing gradient nails. This is not a full tutorial; it is geared towards anyone curious about gradient nails, and how to improve the end result.
Here is what you'll need to get perfect gradient nails (with little to no cleanup involved):


*3-5 different nail colours
*topcoat (I use Orly's Sec'n Dry)
*nail polish remover (I use Kit Advanced, or CVS Advanced nail polish remover)
*cuticle oil (I like to brush it on after the topcoat dries, to give my cuticles some lovin' after all that work)
*painter's tape
*scissors (to cut your painter's tape)
*cosmetic wedges cut into smaller nail-sized pieces
*angled eyeliner brush (for precise cleanup around the cuticle area)
*2-3 Q-tips (for the minimal cleanup you will have)
My top 5 tips:
  1. Use good quality cosmetic wedges: I had decided to try a cheaper grocery store brand of cosmetic wedges, just to save a couple bucks (it was Market Basket brand). Unfortunately, these wedges weren't dense enough and bits began to kind of fall off as I was dabbing my gradient onto the nail. Most drugstores sell decent cosmetic wedges (CVS brand or Quo for those in Canada, work just fine). You want to make sure they are densely packed, and don't look like they will fall apart easily. I prefer the ones with a curved shape on the wider end, so it matches the curve of your nail when dabbing the gradient on.

  2. Tape around your cuticles using painter's tape! You can also use other tapes, like scotch tape or masking tape, but painter's tape works best for me. I find it sticks better, and wraps around your fingers much better than any other tape. I bought a roll for $1.50 at the dollar store! You will be amazed at how much better your gradient turns out when you don't have to spend 20 minutes cleaning up afterward. Eventually, taping your cuticles takes about 2-3 minutes total!
  3. Pick nail polishes that are densely pigmented, and not sheer. Whether you are using cream shades or holo shades, you want to make sure they are very pigmented to make sure each colour shows up well. I would rarely use a jelly for this, unless every colour was a jelly so the gradient would come out equally sheer.

  4. When starting out, pick a natural gradient of colours. Pick one colour, and make a gradient that represents different shades of that colour. For example, if you choose red, start with a light baby pink, a neon pink, then a bright red, and finish with a burgundy or purple.
  5. Before you dab on your gradient, you want to paint your nails with two coats of a white nail polish (like Sally Hansen's Xtreme Wear White On), or the lightest colour in your gradient pattern. I prefer to use the lightest colour in my gradient pattern. If I need to use a nail art brush for clean up around the cuticles, no white peeks through because the base colour is the same as the lightest gradient shade.
Here are some finished nail gradients I did to inspire you:


Thanks for reading! If you have any more questions about gradient nails, feel free to visit me at Facebook, or on Instagram: @theclassyanarchist!  

Sunday, September 15, 2013

Guest Post: Paint Those Piggies


Hello! I only have one more day in Florida! Today I will be spending the day in the Magic Kingdom stalking Cinderella riding a ton of rides! Yesterday I went to Animal Kingdom!
I have been following Erin for quite some time now and am so excited she agreed to guest post for me! I love how perfect her nails are and all her nail art looks. Not too mention, she takes great photos.
 Check out the mani she put together today!
Thanks Erin!
******

Hi everyone, my name is Erin and I run the blog Paint Those Piggies!  When Christa asked me to guest post for her, I was happy to oblige.  We both seem to have a love for color and nail art.  I have been loving her football designs especially since I've been hearing the football countdown from my husband for the last few months haha.  


For my nail art look, I started with my favorite polish color...blue.  I started with a base of my blue version of OPI Gargantuan Green Grape and then freehanded a chevron tip with China Glaze Unpredictable.  I finished off with some simple black dots in Essie Licorice.  


Overall I was quite happy with the finished result.  I will leave it up to you to decide what kind of nails you think these are ;)  Grecian?  Space cadet?  Either one is just fine with me.  Thanks again to Christa for letting me take over.  Have a great day everyone!

Make sure to follow Erin at her links below! You don't want to miss her posts!

Friday, September 13, 2013

Guest Post: Adventures in Polishland


Today is my first day of PLAY! Work is over and I am booking it to my Disney Resort to meet up with my cousin. I cannot wait to throw on my Micky & Minnie Tshirt and romp all over Magic Kingdom! I can't wait to meet Cinderella! <3
I invited Christina from Adventures in Polishland to guest post for me today. I am so excited for her to give you a review of some awesome Urban Outfitters polishes! 
Thanks Christina!
******

Hello from Adventures in Polishland! I am so excited to be on Possibly Polished today! If you're a fan of my blog, you would know I am dedicated to fabulous and affordable nails. Did you also know that you can get some amazing nail polishes at the store Urban Outfitters?! Like many clothing retailers, Urban Outfitters carries a line of store brand nail polish. They come in a variety of colors and types, and even go on clearance for amazing prices! Let me show you some of my favorite polishes from Urban Outfitters.


First up is Bright Lights, a milky white polish with multi-colored hexagonal glitter. Bright Lights has a great but sheer formula. I applied three coats in the photos above, and it is not fully opaque. I really like the look I achieved, but if you would like opacity just layer a coat over a white nail polish. Bright Lights reminds me of an indie nail polish, but it was so much more affordable (even though I love my indies!). I love that Urban Outfitters keeps up with the nail polish trends!


Next up is Sunshine, a golden yellow creme polish. Sunshine has a good formula, especially for a yellow polish! It is opaque in two coats, but I added a third to make sure there were no visible streaks. Sunshine is a great polish for the fall, and can go well with many outfits, especially those olive green tones. I definitely suggest Sunshine if you're looking for a great yellow! 


 Last but not least is Scorcher, a glitter top coat with fine silver glitter and a mix of multi-colored hexagonal glitter. I layered one coat over another Urban Outfitters polish called Freakin' Pink that I featured in THIS blog post. Scorcher is an amazing glitter polish -- the coverage is great and the glitters apply with ease. I just love glitter top coats, and Scorcher is no exception!

All in all, I love the variety of nail polishes that can be found at Urban Outfitters! Not only are they awesome polishes, but they retail for just $5 each or 2 for $8! Be sure to stop by your local Urban Outfitters, or shop online at urbanoutfitters.com. I hope you enjoyed this review, and I hope to see you soon over at Adventures in Polishland


Wednesday, September 11, 2013

Guest Post: Lacquer: The Best Medicine

Hey guys! I am taking off for Orlando today for my business/play trip! I asked Ariel from Lacquer: The Best Medicine to fill in for me. I absolutely LOVE the mani she has to show you guys. I have a soft spot for nude polish and she used it so creatively! Give her a nice welcome!
Thanks Ariel!
******

Hey, Lacquerbeanz!

My name is Ariel, and I'm the girl behind the blog Lacquer: The Best Medicine!. I'm from New Jersey, and I will be starting medical school next September. But most importantly, I LOVE NAILS! - so here is a picture of mine:


I'm so happy that Christa asked me to guest post today. I only recently discovered her blog, but I love it already! :-) I warned her that I was super-busy with studying, so I can't do anything too crazy - but I actually love the way this mani turned out!

I was wearing this nude color (Carrigan) from Pretty & Polished's soon-to-be-released Basics line, and I realized that it was a perfect base for some type of skittle mani that I could use for this post! I didn't know where I was going with it when I started, but I have been into glitter gradients lately (they are SO easy to do!) so I did a glitter gradient on my ring finger using Shimmer Polish Jasmine.  Jasmine is my FAVORITE Shimmer Polish ... isn't it beautiful! Well, it was so beautiful that I had to put it on another nail! :-) So, I added it to my index finger.

Next I found a color that prettily closely matched Shimmer Jasmine: a nice teal-greenish color I have from a brand called Pastel that I won in a giveaway a few months ago. Never heard of it before, but it is a very pretty color! I used sticker guides to achieve the chevron look, and added the same color to my thumb for the full skittle effect! :-)

I topped the whole thing off with my favorite topcoat: HK Girl by Glisten & Glow. It's the best!


What do you guys think? I am so into skittle manis lately!

Thanks again to Christa for featuring me on her blog today. Please feel free to check me out on Facebook and Bloglovin' as well!


Monday, September 9, 2013

Indie Review: Carpe Noctem Cosmetics: Autumnal Secrets

*Press Sample
*Cruelty and 3-Free
*Carpe Noctem Cosmetics

ONE MORE SLEEP UNTIL I GO TO FLORIDA.
I have not packed one thing but I am up to date on all my swatches!
Yesterday, I showed you the lovely Fall collection from Spellbound Nails!


Tonight I have another soon-to-be released Fall collection called Autumnal Secrets made by Emily from Carpe Noctem Cosmetics.
Full disclosure: The above swatches are my own and while that Fall photo emulates them mucho perfecto, I cannot take credit for it. I borrowed it from the Google monster and you can find it as a wallpaper here

Photo heavy but I know you don't mind :)
First up is Samhain Flame.


Samhain Flame is bright red metallic polish that has an auburn look about it in most lighting.


All of the polishes in this collection were 1 coaters, with the exception of Autumn Amber. I used 2 coats to even out any of the brush strokes that can often be seen with metallic type polishes.
1 coat of NYC on top.


The formula was easy to work with and the polish glided on nicely. You can see that even with 2 coats there are some brush strokes left behind, but the color of this is so intense that it hardly matters.
Samhain, for those of you wondering, 
is a Gaelic festival that marks the end of the harvest season and reminds us that 
'winter is coming'. 
Hah. Thanks for the reminder, Em!

BUT lets not rush the Fall weather shall we?!
Next up is Spiced Cider.


Spiced Cider is a rich chocolate brown. The problem with most brown polishes, is they often become too dark after a couple of coats.


That was not the case here. This was opaque in 1 coat but even with 2, the color did not darken very much with the second coat. I know, perfect color for some Football nail art, amiright?
Shown here with an 1 coat of NYC topcoat.


I had no trouble formula wise, it went on easily and dried nicely.
I am really loving the way the light reflects off of Spiced Cider, really showing off the lighter colored particles.

Next we have Autumn Amber.


Autumn Amber is a metallic gold, and essentially is the same shade as my skin here.


This was the only polish out of this collection that I found to not be a 1 coater. Because of the lighter nature, the first coat was splotchy and needed the second to even it out. I like that there is just a little bit of red sparkle giving it a more dynamic look.
Shown with 1 coat of NYC topcoat.


Overall, formula wise, this one wasn't as opaque as the rest of the polishes and it wasn't my favorite, I have used it a couple times for some nail art!

Next up is Mulled Wine.


Right off the bat, I knew this one would be one of my favorites. I fell in love with how appropriate the name is for this wine purple shade.


Last year, I went to Europe and spent a day in Germany. While there I tried glühwein, which is mulled wine. I thought it tasted terrible. I had a case of the dropsies that day and I ended out spilling a bunch on me. This was what color it was. 
Mulled Wine was a 1 coater, but the color was not nearly this deep with 1 coat. I wanted to liven up the color so I used 2 coats here. 1 coat of NYC top coat.


The formula on this one was thicker than the rest and I used thinner coats.
I tend to love these shades on my skin.
I wore this shade for several days and I currently have it on my toes paired with Gorgeous Gourd, which you'll see next!
All of Emily's polishes have such great wear! I get a full 2 weeks on my toes without needing any touchups and at least 5 days on my hands.

The perfecting pairing to Mulled Wine is Gorgeous Gourd.


Gorgeous Gourd is an intensely flame colored orange. I LOVE IT.
This is a serious surprise favorite for me. It is unlike anything in my collection and I didn't think it looked half bad on me.


The 1 coat opacity trend continues, but is shown here as 2 coats with 1 coat of NYC top coat. I wanted this orange to be as intense as it could be.


The formula was great on this one, flowed easily onto my nails and seemed to be the most even and without many streaks.
Want to know when I am going to wearing this?
WHEN THE SECOND HUNGER GAMES MOVIE COMES OUT IN NOVEMBER!
Remind you of the THE GIRL ON FIRE much?
Gahhhhh.

Last but, certaintly not least, is Creeping Ivy.


Creeping Ivy is a lovely emerald green. I liked that it wasn't too vibrant and was a bit more muted than the other polishes in this collection.


Another 1 coater, but I used 2 here with 1 coat of NYC top coat. Like GG, this one was absent of any brush strokes.


The formula was fabulous and it dried evenly.

Overall, I really love this collection. Between the amazing glitters you saw by Spellbound yesterday and these solids, I suppose I can say goodbye to summer and welcome Fall.

My top picks are Spiced Cider, Mulled Wine and Gorgeous Gourd. 
These polishes will be on sale Saturday, September 14th.

You can find Carpe Noctem Cosmetics at the following links:

Will you be picking any of these up?

**Disclosure: The product(s) in this post were provided to me by their manufacturer for my unbiased review. I covered the cost of shipping the samples. Please see my Disclaimer page for more info**